
6 min read

Pool Skimmer Installation: 10 Mistakes That Cause Leaks and Failures

Pool Skimmer Installation
Pool Skimmer Installation: 10 Mistakes That Cause Leaks and Failures
11:57

A pool skimmer is not simply a plastic part set into the pool wall and connected to a pipe. Its elevation, structural support, surrounding concrete, reinforcement, plumbing connection, skimmer throat, finish transitions, and final relationship to the waterline must all work together.

That matters because many of the details that determine whether a skimmer performs well or fails later are hidden once the pool is finished. A skimmer can look fine from inside the pool and still develop leaks, cracking, or separation over time.

In many cases, the repair ends up being much larger than homeowners expect because the issue is not just the plastic skimmer body. The real problem is often how the skimmer was installed and connected to the surrounding pool structure.

In this article, we will walk through how a pool skimmer should be installed, the most common construction mistakes that can lead to leaks and failures, and what homeowners should ask before approving a repair or replacement.


Why Proper Pool Skimmer Installation Matters

A pool skimmer is part of the pool’s circulation system, but it also becomes part of the finished pool structure. That means it has to connect correctly to several different materials and systems at once:

  • The reinforced pool shellSkimmer blog 2-1
  • The plumbing line
  • The surrounding concrete
  • The skimmer throat
  • The waterproofing or interior finish system
  • The waterline tile area
  • The coping and adjacent deck conditions
  • The final operating water level

Each of those connections matters. If one is poorly planned or built, the skimmer may become a weak point in the pool.  For homeowners, the key issue is simple: a skimmer problem is not always just a skimmer problem. It may be a construction, transition, support, or plumbing-stress problem that shows up at the skimmer first.


Why a Pool Skimmer Can Leak Even When It Looks Fine

One of the most frustrating parts of skimmer failures is that the visible portion may look fine for years, even with the skimmer lid on. The tile may look straight. The waterline may appear normal. The opening may seem intact.

But the important conditions are often hidden behind the finished surfaces.

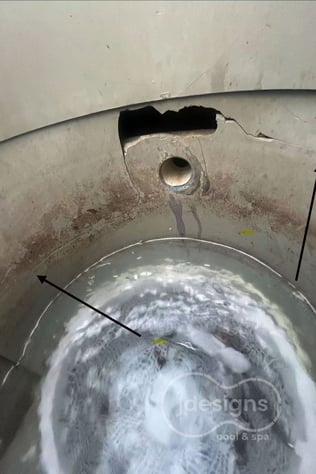
A skimmer may eventually leak, crack, or separate because of issues such as:Skimmer blog 5

  • Incorrect elevation during installation
  • Inadequate support behind or beneath the skimmer body
  • Poor concrete placement around the skimmer
  • Improper reinforcement or detailing
  • Plumbing that places stress on the skimmer connection
  • Weak construction at the skimmer throat
  • Poor transitions between the skimmer and the pool finish
  • Damage during later phases of construction

This means a homeowner may notice water loss, cracking, movement, staining, or tile separation long after the original installation is covered.


How a Pool Skimmer Should Be Installed

Proper skimmer installation is not a single step. It is a sequence of coordinated construction decisions.

Correct elevation

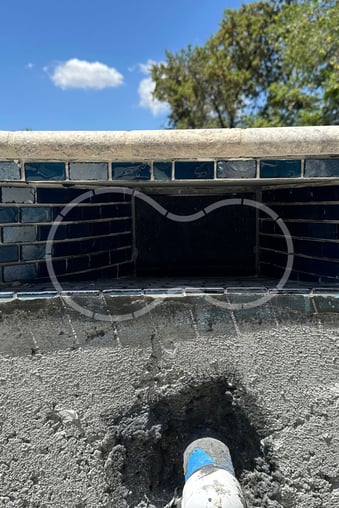
Set the skimmer at the correct height relative to the intended waterline, tile band, coping, and finished pool interior. If it is set too high or too low, the pool may not skim properly, the waterline relationship can look wrong, and correcting the issue after completion may require invasive repair.

skimmer blog 8

Structural support

Place the skimmer body so it is properly supported within the construction assembly. Do not treat it like a loose plastic component that will remain stable simply because concrete is placed nearby.

Concrete around the skimmer

The surrounding concrete must help integrate the skimmer into the pool structure. Voids, weak encapsulation, poor consolidation, or poorly planned transitions can leave the skimmer area vulnerable to movement and leakage.

Reinforcement and detailing

The skimmer opening interrupts a structural area of the wall. That means reinforcement and related detailing matter. The goal is not simply to fill the space around the skimmer, but to create a durable connection that works as part of the pool wall assembly.

Plumbing connection and support

Install and support the plumbing connection so the line does not place ongoing stress on the skimmer body. If the pipe is misaligned, poorly supported, or forced into position, movement and stress can transfer into the skimmer over time.


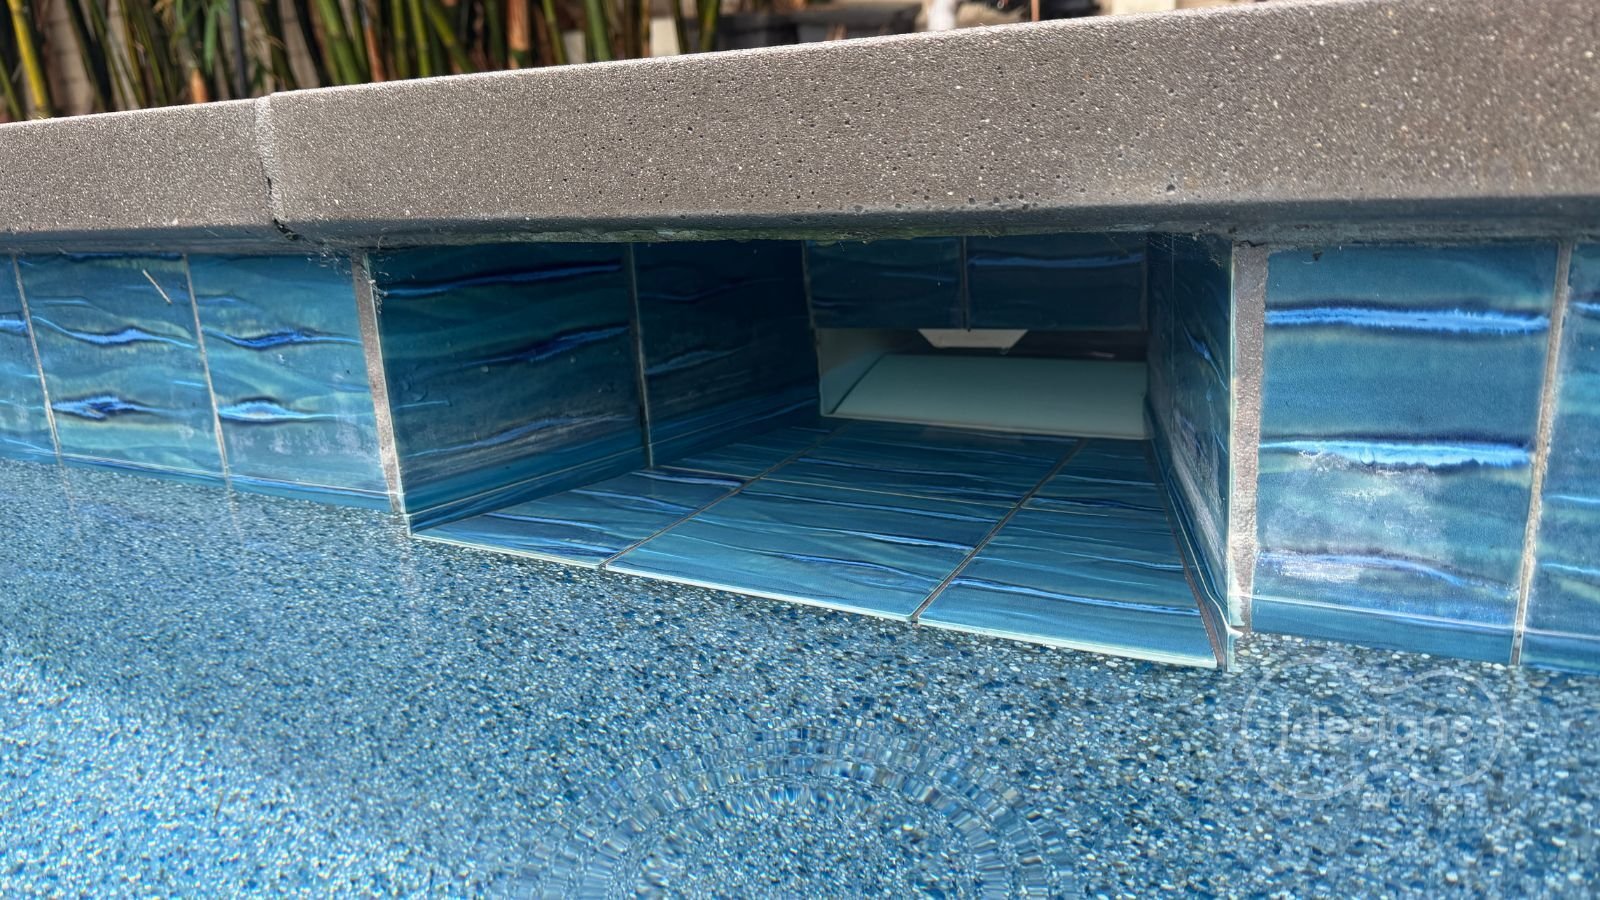
Why the Skimmer Throat Is Such a Critical Area

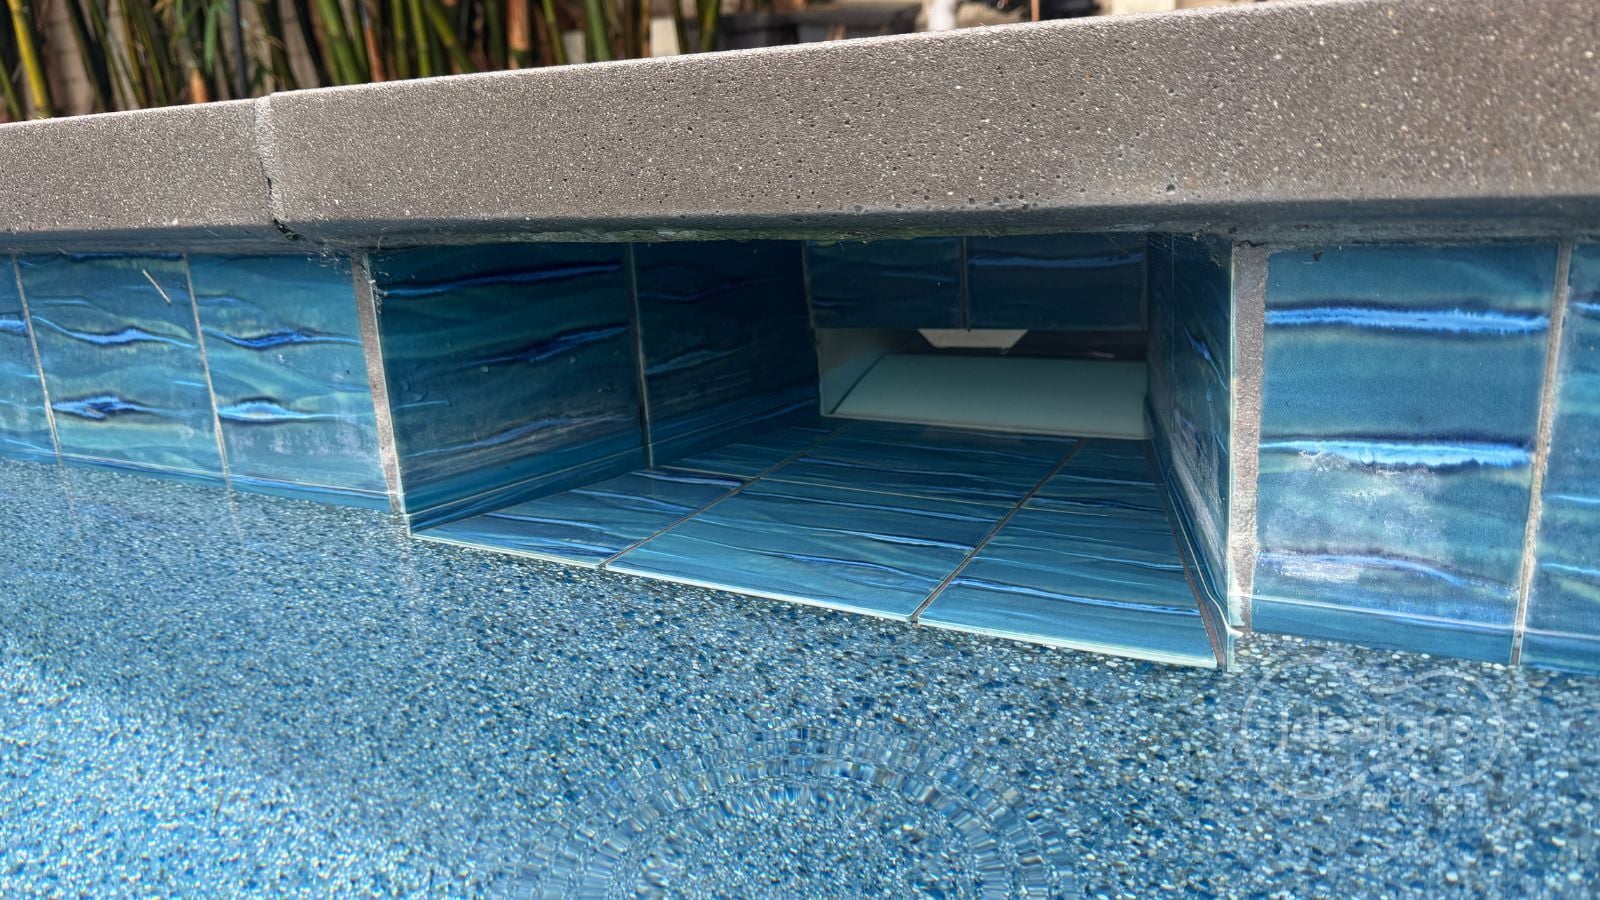
The skimmer throat is one of the most important and most commonly misunderstood parts of the installation.

This is the transition area between the skimmer body and the visible pool interior. It is where multiple systems come together:Skimmer blog 6

  • The skimmer body
  • The pool shell
  • The interior finish or waterproofing system
  • The waterline tile zone
  • The coping relationship above

If this area is poorly built, a skimmer may look acceptable at first but remain vulnerable to leakage, separation, cracking, or finish failure later.

For homeowners, this is often where the repair becomes larger than expected. Rebuilding the throat correctly may involve more than replacing the skimmer body itself. It may also require opening adjacent materials and restoring the connection to the existing pool structure.


These Installation Mistakes Cause Leaks and Failures

Below are some of the most common issues that can turn a skimmer into a future repair.

1. The skimmer was set too high

What was done: The skimmer was installed above the intended waterline.

Why it is a problem: The pool may not skim properly, the water level may sit awkwardly relative to the tile line, and the construction around the throat may be compromised.

What a homeowner may notice: Poor surface skimming, unusual waterline appearance, or visible finish and tile issues near the opening.

2. The skimmer was set too low

What was done: The skimmer was installed below its intended elevation.

Why it is a problem: Waterline relationships can be thrown off, hydraulic performance may suffer, and correcting it after completion can require significant demolition.

What a homeowner may notice: Poor water-level performance, an odd tile relationship, or repeated attempts to compensate for the wrong setting.

3. The skimmer was poorly supported

What was done: The skimmer was placed without adequate support behind or beneath the body.

Why it is a problem: Movement over time can stress the surrounding concrete, throat, and plumbing connection.

What a homeowner may notice: Cracking, separation, or leaks developing around the skimmer area.

4. There was inadequate concrete around the skimmer

What was done: Concrete placement around the skimmer was weak, incomplete, or poorly consolidated.

Why it is a problem: The skimmer area may not perform as a durable part of the wall assembly.

What a homeowner may notice: Leaks, hollow-sounding areas, cracking, or failure near the skimmer opening.

Skimmer blog 7-1

5. Reinforcement or detailing was handled poorly

What was done: The skimmer opening was not integrated carefully into the surrounding structural assembly.

Why it is a problem: The wall area around the skimmer may become more vulnerable to movement, cracking, or long-term separation.

What a homeowner may notice: Cracks around the skimmer area or recurring repairs that do not last.

6. The plumbing puts stress on the skimmer

What was done: The connected pipe was misaligned, unsupported, or forced into position.

Why it is a problem: Ongoing mechanical stress can transfer into the skimmer body or connection point.

What a homeowner may notice: Leaks at the skimmer connection, recurring repairs, or a cracked skimmer body.

7. The skimmer throat was built poorly

What was done: The transition between the skimmer and the finished pool interior was not rebuilt or detailed correctly.

Why it is a problem: This is one of the most sensitive interfaces in the assembly.

What a homeowner may notice: Water loss, visible cracking, tile separation, or deterioration around the opening.

8. The finish or waterproofing transition was weak

What was done: The transition between the skimmer and surrounding finish system was handled poorly.

Why it is a problem: Even if the skimmer body itself is intact, water may still exploit weaknesses at the interface.

What a homeowner may notice: Moisture-related staining, leaks, cracking, or finish distress around the skimmer.

9. Tile, coping, and waterline conditions were not coordinated

What was done: The skimmer was installed without proper consideration of the final visible construction conditions.

Why it is a problem: Even a technically installed skimmer can become a functional or aesthetic problem if the final relationships were not planned correctly.

What a homeowner may notice: Awkward alignment, poor finish transitions, or a waterline that does not look right.

10. The skimmer was damaged during later construction phases

What was done: The skimmer was bumped, stressed, or compromised during subsequent work.

Why it is a problem: Damage introduced after installation may remain hidden until the pool is in service.

What a homeowner may notice: Leaks, cracking, or unexplained failure that appears disconnected from the original construction phase.

This is why diagnosis matters. If you don't identify the failure point correctly, a repair can address the symptom without fixing the cause.


Should You Repair or Replace a Damaged Pool Skimmer?

That depends on what has actually failed.

Some skimmer-related issues are minor component problems, such as a missing weir, a damaged basket, or a maintenance issue that does not involve the structure. Other conditions, such as cracking, separation, persistent leakage, or visible distress around the throat, may require a more serious repair evaluation.

A replacement should never be viewed as simply removing an old plastic box and installing a new one. If the surrounding connection to the pool structure is not rebuilt correctly, the new skimmer can inherit the same failure path as the old one.

In many cases, the better question isn't whether the skimmer should be replaced. The better question is why it failed in the first place.


What Should You Ask Before Hiring Someone to Replace a Pool Skimmer?

Before approving skimmer replacement work, homeowners should ask a few practical questions:

  1. How will the new skimmer be structurally supported?
  2. How will the plumbing be installed and supported so it does not stress the skimmer?
  3. How will the skimmer throat be rebuilt?
  4. How will the connection to the existing pool structure be addressed?
  5. How will the tile, interior finish, and surrounding visible materials be restored?
  6. What conditions will be exposed and inspected before the work is covered back up?
  7. How will you determine whether the leak is in the skimmer body, the plumbing connection, the throat, or the surrounding structure?

Our recommendations

Your pool skimmer may be small, but how it connects to the pool’s structure, plumbing, and finishes makes a big difference in how well it holds up over time.

If you’re noticing water loss, cracks, or separation around the skimmer, it’s worth understanding the cause before approving a patch or replacement. A surface repair may hide the symptoms without addressing the underlying installation problem, leaving you facing the same issue again.

You don’t need to diagnose it yourself. At J Designs Pool & Spa, we can help you understand what may be happening, what needs inspection, and what a repair should address before the work is covered back up.

Contact J Designs Pool & Spa to discuss your skimmer concerns and the next steps for an evaluation. Tell us what you’ve noticed and share any photos or details about previous repairs so we can start the conversation with a clearer picture of your pool.


Pool Skimmer Installation: 10 Mistakes That Cause Leaks and Failures

Pool Skimmer Installation: 10 Mistakes That Cause Leaks and Failures

A pool skimmer is not simply a plastic part set into the pool wall and connected to a pipe. Its elevation, structural support, surrounding concrete,...
Read More
Stainless Steel Pools in Los Angeles: When Do They Make Sense?

Stainless Steel Pools in Los Angeles: When Do They Make Sense?

When most homeowners picture a swimming pool, they probably picture a concrete or shotcrete structure built into the ground.

Read More
Epoxy Grout for Swimming Pools, What you need to know

Epoxy Grout for Swimming Pools, What you need to know

When most homeowners choose tile for a swimming pool, they naturally focus on the tile itself: the color, shape, texture, and overall design, because...

Read More
What Is a Pool Skimmer? How It Works and Why It Matters

What Is a Pool Skimmer? How It Works and Why It Matters

Learn what a pool skimmer does and how its placement, plumbing, water level, and landscaping affect pool circulation and equipment performance.

Read More
Risks of adding Chlorine Tablets in the Skimmer

Risks of adding Chlorine Tablets in the Skimmer

Explore the dangers of placing chlorine tablets directly in your pool's skimmer and learn safer alternatives for maintaining crystal clear water.

Read More
Professional Pool Service: Why True Value Goes Beyond Price

Professional Pool Service: Why True Value Goes Beyond Price

Wondering why pool service prices vary so much? Learn what’s really included, what cheap services skip, and how to protect your pool from damage.

Read More